最近は作った作品を紹介することが多かったのですが、やっぱり自分のできることを増やさないことには、同じようなものばかり作ることになってつまらないので、久々に新しいモジュールを使えるようにしたいと思います。
ということで、今回はArduino LCD Screenを使ってみたいと思います。画像表示ができるようになると色々楽しそうなので。
こちらによると、表示できるファイル形式はbmp(ビットマップ)形式のみで、解像度は160×128ピクセルとのことです。一応はArduino Esploraを意識した製品らしいのですが、他のArduinoでも使えるそうなので、まずはオーソドックスにArduino Unoで使ってみましょう。
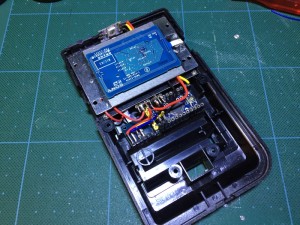
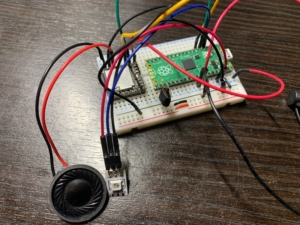
まずはこちらのページに従って配線します。
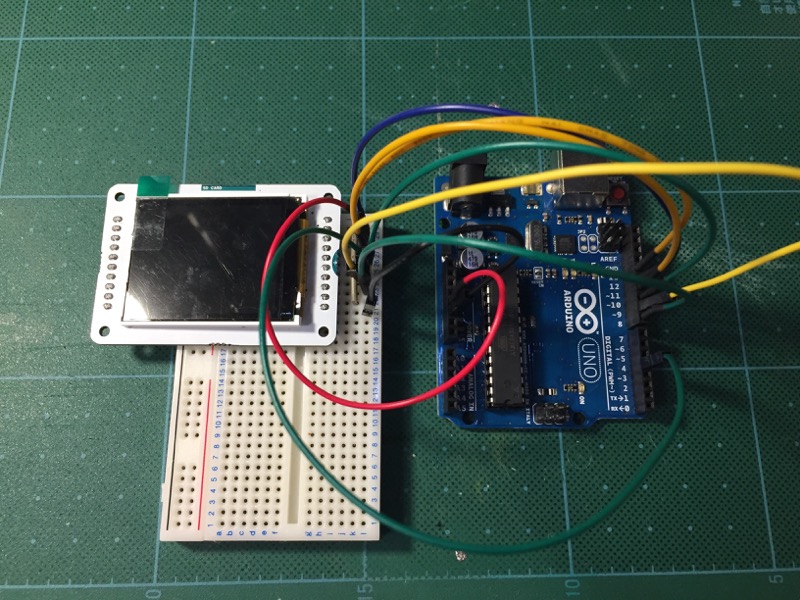
うーん、ものすごい数のピンを使ってしまうなあ。。。
続いてソフト側の準備です。まずはとにもかくにもライブラリですが、こちらのページによると、どうやら自分の使っている開発環境(1.6.8)だと初めから組み込まれている模様です。
ということで、早速サンプルコードを書いていきたいと思います。サンプルコードの作成は、ほぼこちらの手順に沿っていきます。
コードを書く前に、表示する画像をMicro SDカードの最上位階層に保存しておきます。SDカードの方はFAT16かFAT32でフォーマットしておかなくてはならない模様。サンプルのビットマップ画像( “logo.bmp”)は上記のページに置かれています。
で、サンプルコードもほぼそのまま使います。こちらのページの一番最後にあるソースの中の、ファイル名が”arduino.bmp”になっているのを”logo.bmp”に変えただけです。
// include the necessary libraries
#include <SPI.h>
#include <SD.h>
#include <TFT.h> // Arduino LCD library

// pin definition for the Uno
#define sd_cs   4
#define lcd_cs  10
#define dc      9
#define rst     8

TFT TFTscreen = TFT(lcd_cs, dc, rst);

// this variable represents the image to be drawn on screen
PImage logo;

void setup() {

    // initialize the GLCD and show a message
    // asking the user to open the serial line
    TFTscreen.begin();
    TFTscreen.background(255, 255, 255);

    TFTscreen.stroke(0, 0, 255);
    TFTscreen.println();
    TFTscreen.println(F("Arduino TFT Bitmap Example"));
    TFTscreen.stroke(0, 0, 0);
    TFTscreen.println(F("Open serial monitor"));
    TFTscreen.println(F("to run the sketch"));

    // initialize the serial port: it will be used to
    // print some diagnostic info
    Serial.begin(9600);

    while (!Serial) {
        // wait for serial port to connect. Needed for native USB port only
    }

    // clear the GLCD screen before starting
    TFTscreen.background(255, 255, 255);

    // try to access the SD card. If that fails (e.g.
    // no card present), the setup process will stop.
    Serial.print(F("Initializing SD card..."));

    if (!SD.begin(sd_cs)) {
        Serial.println(F("failed!"));
        return;
    }

    Serial.println(F("OK!"));

    // initialize and clear the GLCD screen
    TFTscreen.begin();
    TFTscreen.background(255, 255, 255);

    // now that the SD card can be accessed, try to load the
    // image file.
    logo = TFTscreen.loadImage("logo.bmp");

    if (!logo.isValid()) {
        Serial.println(F("error while loading logo.bmp"));
    }
}

void loop() {

    // don’t do anything if the image wasn’t loaded correctly.
    if (logo.isValid() == false) {
        return;
    }

    Serial.println(F("drawing image"));

    // get a random location where to draw the image.
    // To avoid the image to be drawn outside the screen,
    // take into account the image size.
    int x = random(TFTscreen.width() - logo.width());
    int y = random(TFTscreen.height() - logo.height());

    // draw the image to the screen
    TFTscreen.image(logo, x, y);

    // wait a little bit before drawing again
    delay(1500);
}
では早速動かしてみましょう。
うん。特に問題なしです。
とりあえず使えることはわかったものの、何をどんな感じで表示できるのかがまだピンと来ていないので、一つずつ確認していきます。
まずは単純に画像を一枚表示させる、ということをやろうと思いますが、Arduinoのロゴマークだけ表示させていても面白くないので、自分でbmpファイルを用意することにします。
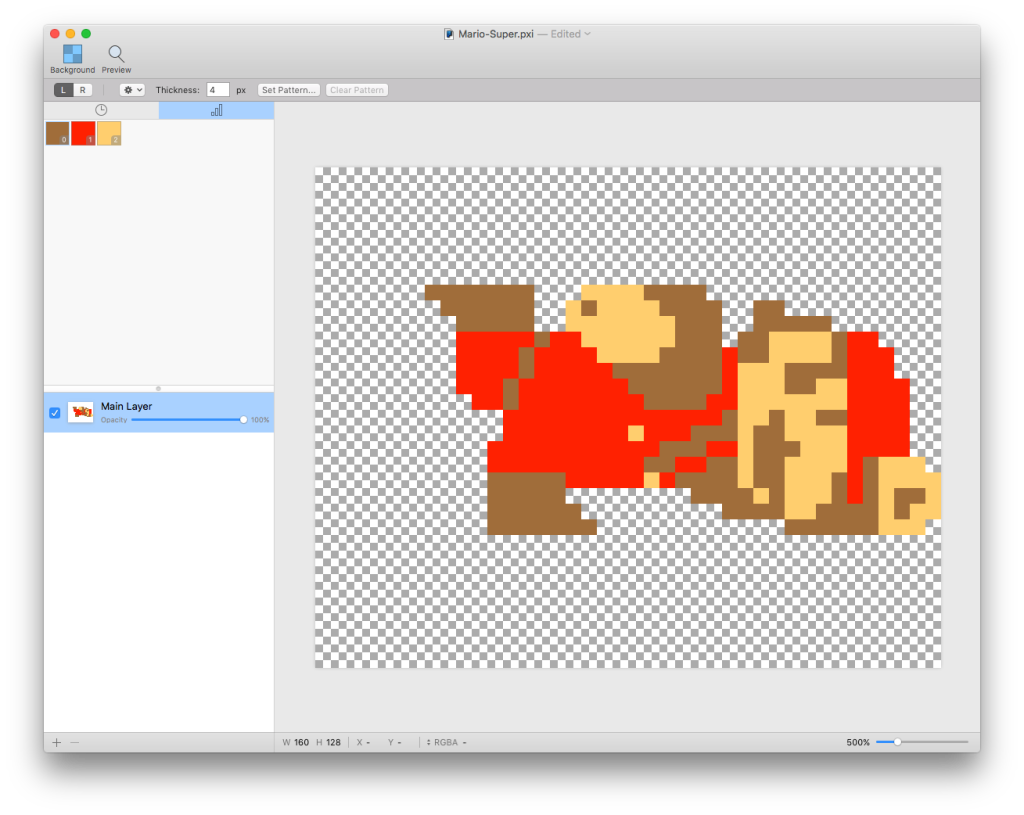
あんまり解像度が高くないので、ドット絵を表示するぐらいが丁度良いかと思い、bmp形式でファイルをエクスポート可能なPixenというドット絵エディタでマリオを描いてみました。
早速SDカードに入れて、以下のソースで表示させてみました。
#include <SPI.h>
#include <SD.h>
#include <TFT.h>

// pin definition for the Uno
#define sd_cs   4
#define lcd_cs  10
#define dc      9
#define rst     8

TFT TFTscreen = TFT(lcd_cs, dc, rst);

PImage picture;

void setup() {

    Serial.begin(9600);

    // initialize and clear the GLCD screen
    TFTscreen.begin();
    TFTscreen.background(255, 255, 255);

    Serial.print(F("Initializing SD card..."));

    if (!SD.begin(sd_cs)) {
        Serial.println(F("failed!"));
        return;
    }

    Serial.println(F("OK!"));

    // now that the SD card can be accessed, try to load the
    // image file.
    picture = TFTscreen.loadImage("mario.bmp");

    if (!picture.isValid()) {
        Serial.println(F("error while loading mario.bmp"));
    }

    // draw the image to the screen
    TFTscreen.image(picture, 0, 0);
}

void loop() {

    // don’t do anything if the image wasn’t loaded correctly.
    if (picture.isValid() == false) {
        return;
    }

    // draw the image to the screen
    // TFTscreen.image(picture, 0, 0);

    // wait a little bit before drawing again
    delay(1500);
}
。。。しかし、表示されず。Arduinoのロゴマークだと表示されたので、ログ出力を確認してみたところ、以下の違いがありました。
// Arduinoロゴ画像
Initializing SD card...OK!
File size: 6966
Image Offset: 54
Header size: 40
Bit Depth: 24
Image size: 48x48

// 自作画像
Initializing SD card...OK!
File size: 81974
Image Offset: 54
Header size: 40
Bit Depth: 32
loadImage: invalid pixel format
error while loading mario.bmp
どうやら24bitのbmpでないとダメみたいなのですが、Pixenの出力するbmpは32bitなので、24bitに変換してやる必要があります。幸い、Pixenの出力したbmpファイルをMacのプレビューで開き直し、プレビュー上でbmp形式指定で書き出すことで、24bitに変換することができました。
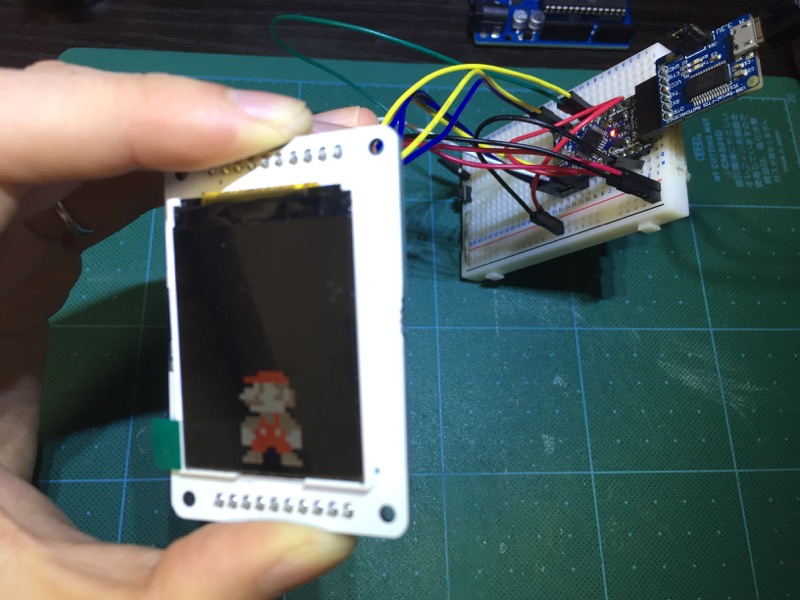
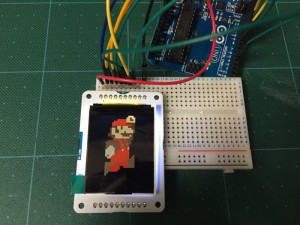
24bitに変換したbmpファイルをSDカードに置き直し、再度表示させてみたところ、今度は無事に表示されました。

うん、良い感じです。ちなみに画像サイズはディスプレイの解像度と同じ160×128にしています。
次に、「描画にどれぐらい時間がかかるのか?」の検証です。ボタン操作で2つの画像を切り替えられるようにしてみました。表示する画像のサイズは、どちらもディスプレイの解像度と同じ160×128です。
#include <SPI.h>
#include <SD.h>
#include <TFT.h>

// pin definition for the Uno
#define sd_cs   4
#define lcd_cs  10
#define dc      9
#define rst     8

#define CHANGE_PIN  5

TFT TFTscreen = TFT(lcd_cs, dc, rst);

PImage picture;

uint8_t last_button_state = HIGH;
uint8_t button_state      = HIGH;
boolean isSmall           = true;

void setup() {

    Serial.begin(9600);
    pinMode(CHANGE_PIN, INPUT_PULLUP);

    // initialize and clear the GLCD screen
    TFTscreen.begin();
    TFTscreen.background(255, 255, 255);

    Serial.print(F("Initializing SD card..."));

    if (!SD.begin(sd_cs)) {
        Serial.println(F("failed!"));
        return;
    }

    Serial.println(F("OK!"));

    // now that the SD card can be accessed, try to load the
    // image file.
    picture = TFTscreen.loadImage("mario1.bmp");

    if (!picture.isValid()) {
        Serial.println(F("error while loading mario1.bmp"));
    }

    // draw the image to the screen
    TFTscreen.image(picture, 0, 0);
}

void loop() {

    // don’t do anything if the image wasn’t loaded correctly.
    if (picture.isValid() == false) {
        return;
    }

    button_state = digitalRead(CHANGE_PIN);

    if (last_button_state == HIGH && button_state == LOW) {

        if (isSmall) {

            picture = TFTscreen.loadImage("mario2.bmp");

            if (!picture.isValid()) {
                Serial.println(F("error while loading mario2.bmp"));
            }

            TFTscreen.image(picture, 0, 0);
        }
        else {

            picture = TFTscreen.loadImage("mario1.bmp");

            if (!picture.isValid()) {
                Serial.println(F("error while loading mario1.bmp"));
            }

            TFTscreen.image(picture, 0, 0);
        }

        isSmall = !isSmall;
    }

    last_button_state = button_state;

    delay(20);
}
結果はこんな感じになりました。
少なくとも最大サイズの画像の描画には2〜3秒はかかるようです。これだとアニメーションは無理そうだなあ。
最後に、「Arduino Pro miniでも動くのか?」 の確認です。自分は工作だとArduino Pro miniを使うことが多いので。
使ったPro miniは5V 16MHz版ですが、特にソースコードの変更も必要なく動かすことができました。よかったよかった。
ということで、Arduion LCD Screenを簡単にですが触ってみました。描画に時間がかかるという弱点はあるものの、DFPlayerと組み合わせることで、Arduinoで映像と音声をフォローできるようになるので、だいぶいろんなことができるようになるんじゃないかなーという気がしています。
ただ一つ注意が必要なのが、LCDライブラリのサイズがメチャメチャ大きいということです。例えば一番最初のサンプルコードは、Arduino Pro Mini向けにコンパイルすると、あんな短いコードでも
最大30,720バイトのフラッシュメモリのうち、スケッチが21,430バイト(69%)を使っています。
最大2,048バイトのRAMのうち、グローバル変数が1,025バイト(50%)を使っていて、ローカル変数で1,023バイト使うことができます。
という表示が出てきます。
そのため、Arduion LCD Screenだけを使うようならそこまで問題はないかもしれませんが、他にもライブラリのサイズが大きいようなモジュールを併用することになると、ちょっと問題になりそうです。
コメント
コメント一覧 (1件)
[…] 用するモジュールです。マイクロSDカードに保存した画像(bmp)を表示できるので、容量の小さいArduinoでも画像を扱えるようになります。使い方につきましては、こちらをご参照ください。 […]